Bulk actions
Select many patients at once to tag them, set their location, export them, or archive them.
When you tick one or more rows in the patients list, a bulk actions bar appears above the table showing how many patients are selected. Everything in the bar applies to the whole selection at once.
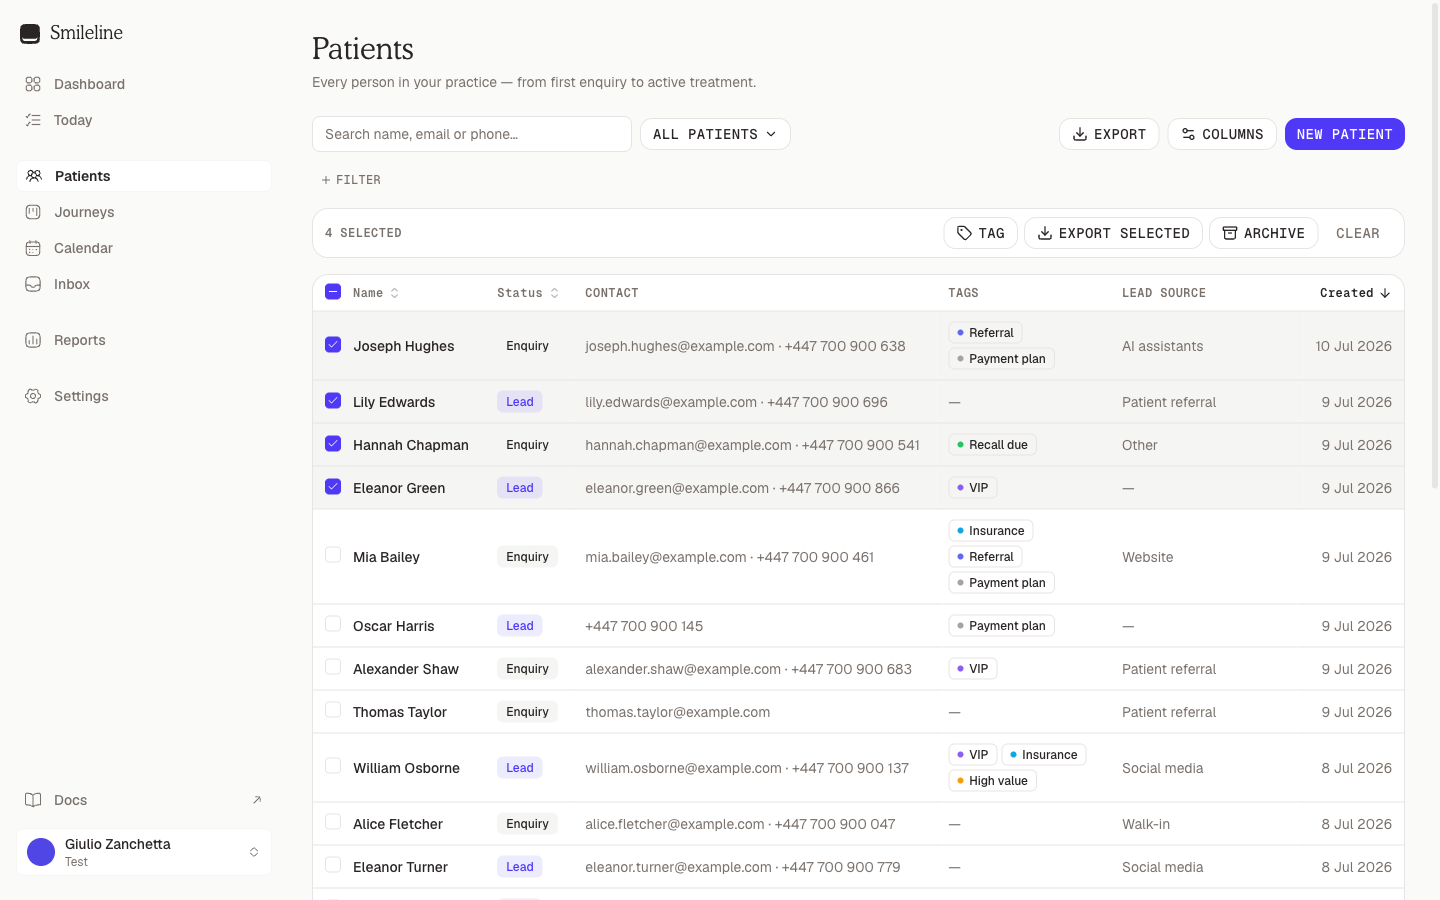
Select patients
Use the checkboxes in the first column to select rows. The checkbox in the header selects every row on the current page. Click Clear in the bar to deselect everything.
Selection works page by page. To act on a group that spans many pages, narrow it with filters first, then select as you go — or consider whether a saved view serves you better than a one-off bulk change.
Tag
Click Tag and pick a tag from the menu to add it to every selected patient. Patients who already carry the tag are unaffected — the tag is never duplicated. Tags themselves are managed in Settings; if none exist yet, the menu says No tags configured.
Set location
For practices with more than one location, click Set location and pick a location to assign it to every selected patient, or choose No location to clear it. The menu doesn't appear in single-location practices.
Export selected
Click Export selected to download just the ticked patients as a CSV. See CSV export for how columns and the row limit work.
Message selected or a segment
Owners and managers can click Message selected to start an outbound campaign for up to 500 explicitly selected patients. To message a larger or reusable audience, apply filters or open a saved view and click Message segment above the table instead.
Both actions open the campaign composer; nothing sends from the patient list itself. Smileline previews channel-specific consent and deduplicates shared destinations before launch. See Outbound campaigns.
Archive
Click Archive, then confirm in the dialog. Archived patients disappear from lists and queues but keep all their history — find them again with the Archived preset view or a Type filter.
If the selection includes leads with fewer contact attempts than the practice's tries before giving up (nine unless changed in Settings → Not-proceeding reasons), nothing is archived yet: a second dialog says how many there are. Keep them cancels the whole archive. Archive anyway asks for a written reason, which is saved on the timeline of each of those leads; then the whole selection is archived. It is the same rule as archiving a single lead.
Archiving is only available to practice admins and owners, and there is currently no un-archive action in the app. Double-check the selection count in the confirmation dialog before you confirm.